On-Device Training: Building an Android Application
In this tutorial, we will explore how to build an Android application that incorporates ONNX Runtime’s On-Device Training solution. On-device training refers to the process of training a machine learning model directly on an edge device without relying on cloud services or external servers.
Here is what the application will look like at the end of this tutorial:
Introduction
We will guide you through the steps to create an Android app that can train a simple image classification model using on-device training techniques. This tutorial showcases the transfer learning technique where knowledge gained from training a model on one task is leveraged to improve the performance of a model on a different but related task. Instead of starting the learning process from scratch, transfer learning allows us to transfer the knowledge or features learned by a pre-trained model to a new task.
For this tutorial, we will leverage the MobileNetV2 model which has been trained on large-scale image datasets such as ImageNet (which has 1,000 classes). We will use this model for classifying custom data into one of four classes. The initial layers of MobileNetV2 serve as a feature extractor, capturing generic visual features applicable to various tasks, and only the final classifier layer will be trained for the task at hand.
In this tutorial, we will use data to learn to:
- Classify animals into one of four categories using a pre-packed animals dataset.
- Classify celebrities into one of four categories using a custom celebrities dataset.
Table of Contents
- Table of Contents
- Prerequisites
- Offline Phase - Building the training artifacts
- Training Phase - Android application development
- Training Phase - Running the application on a device
- Conclusion
Prerequisites
To follow this tutorial, you should have a basic understanding of Android app development using Java or Kotlin. Familiarity with C++ as well as familiarity with machine learning concepts such as neural networks and image classification will help as well.
- Python development environment to prepare the training artifacts
- Android Studio 4.1+
- Android SDK 29+
- Android NDK r21+
- An Android device with a camera in developer mode with USB debugging enabled
Note The entire android application is also made available on the
onnxruntime-training-examplesGitHub repository.
Offline Phase - Building the training artifacts
-
We start with a pre-trained PyTorch model and export it to ONNX. The
MobileNetV2model has been pretrained on the imagenet dataset that has data in 1000 categories. For our task of image classification, we want to only classify images in 4 classes. So, we change the last layer of the model to output 4 logits instead of 1,000.More details around how to export PyTorch models to ONNX can be found here.
import torch import torchvision model = torchvision.models.mobilenet_v2( weights=torchvision.models.MobileNet_V2_Weights.IMAGENET1K_V2) # The original model is trained on imagenet which has 1000 classes. # For our image classification scenario, we need to classify among 4 categories. # So we need to change the last layer of the model to have 4 outputs. model.classifier[1] = torch.nn.Linear(1280, 4) # Export the model to ONNX. model_name = "mobilenetv2" torch.onnx.export(model, torch.randn(1, 3, 224, 224), f"training_artifacts/{model_name}.onnx", input_names=["input"], output_names=["output"], dynamic_axes={"input": {0: "batch"}, "output": {0: "batch"}}) -
Define the trainable and non trainable parameters
import onnx # Load the onnx model. onnx_model = onnx.load(f"training_artifacts/{model_name}.onnx") # Define the parameters that require their gradients to be computed # (trainable parameters) and those that do not (frozen/non trainable parameters). requires_grad = ["classifier.1.weight", "classifier.1.bias"] frozen_params = [ param.name for param in onnx_model.graph.initializer if param.name not in requires_grad ] -
Generate the training artifacts.
We will use the
CrossEntropyLossloss and theAdamWoptimizer for this tutorial. More details around artifact generation can be found here.from onnxruntime.training import artifacts # Generate the training artifacts. artifacts.generate_artifacts( onnx_model, requires_grad=requires_grad, frozen_params=frozen_params, loss=artifacts.LossType.CrossEntropyLoss, optimizer=artifacts.OptimType.AdamW, artifact_directory="training_artifacts" )That’s all! The training artifacts have been generated in the
training_artifactsfolder. This marks the end of the offline phase. These artifacts are ready to be deployed to the Android device for training.
Training Phase - Android application development
-
Setting up the project in Android Studio
a. Open Android Studio and click
New Project
b. Click on
Native C++->Next. Fill out theNew Projectdetails as follows:- Name -
ORT Personalize - Package Name -
com.example.ortpersonalize - Language -
Kotlin
Click
Next.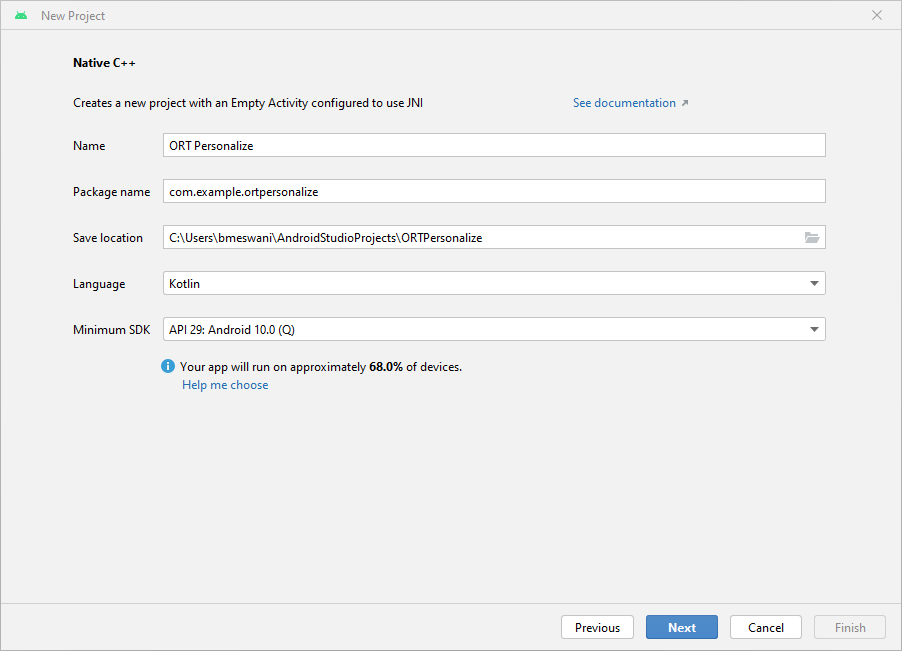
c. Select the
C++17toolchain ->Finish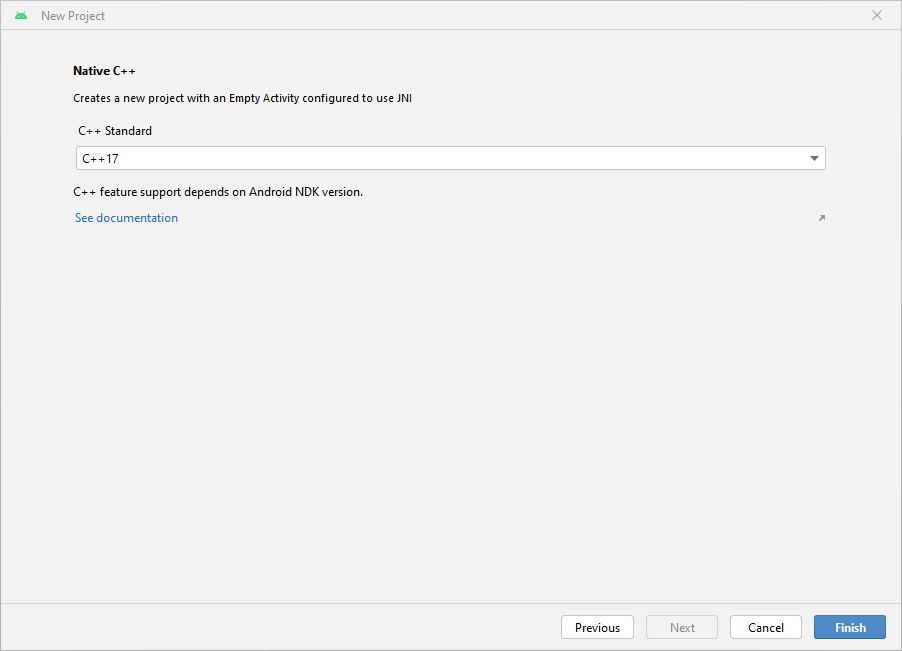
d. That’s it! The Android Studio project has been set up. You should now be able to see the Android Studio editor with some boiler plate code.
- Name -
-
Adding the ONNX Runtime dependency
a. Create two new folders called
libandinclude\onnxruntimeunder the cpp directory in the Android Studio project.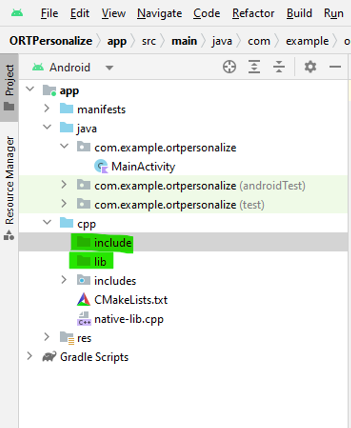
b. Head over to Maven Central. Go to
Versions->Browse-> and download theonnxruntime-training-androidarchive package (aar file).c. Rename the
aarextension tozip. Soonnxruntime-training-android-1.15.0.aarbecomesonnxruntime-training-android-1.15.0.zip.d. Extract the contents of the zip file.
e. Copy the
libonnxruntime.soshared library from thejni\arm64-v8afolder to your Android project under the newly createdlibfolder.f. Copy the contents of the
headersfolder to the newly createdinclude\onnxruntimefolder.g. In the
native-lib.cppfile, include the training cxx header file.#include "onnxruntime_training_cxx_api.h"h. Add
abiFiltersto thebuild.gradle (Module)file so as to selectarm64-v8a. This setting must be added underdefaultConfiginbuild.gradle:ndk { abiFilters 'arm64-v8a' }Note that the
defaultConfigsection of thebuild.gradlefile should look like:defaultConfig { applicationId "com.example.ortpersonalize" minSdk 29 targetSdk 33 versionCode 1 versionName "1.0" testInstrumentationRunner "androidx.test.runner.AndroidJUnitRunner" externalNativeBuild { cmake { cppFlags '-std=c++17' } } + ndk { + abiFilters 'arm64-v8a' + } }i. Add the
onnxruntimeshared library to theCMakeLists.txtso thatcmakecan find and build against the shared library. To do this, add these lines after theortpersonalizelibrary is added in theCMakeLists.txt:add_library(onnxruntime SHARED IMPORTED) set_target_properties(onnxruntime PROPERTIES IMPORTED_LOCATION ${CMAKE_SOURCE_DIR}/lib/libonnxruntime.so)Let
CMakeknow where the ONNX Runtime header files can be found by adding this line right after the above two lines:target_include_directories(ortpersonalize PRIVATE ${CMAKE_SOURCE_DIR}/include/onnxruntime)Link the Android C++ project against the
onnxruntimelibrary by adding theonnxruntimelibrary totarget_link_libraries:target_link_libraries( # Specifies the target library. ortpersonalize # Links the target library to the log library # included in the NDK. ${log-lib} onnxruntime)Note that the
CMakeLists.txtfile should look like:project("ortpersonalize") add_library( # Sets the name of the library. ortpersonalize # Sets the library as a shared library. SHARED # Provides a relative path to your source file(s). native-lib.cpp + utils.cpp + inference.cpp + train.cpp) + add_library(onnxruntime SHARED IMPORTED) + set_target_properties(onnxruntime PROPERTIES IMPORTED_LOCATION ${CMAKE_SOURCE_DIR}/lib/libonnxruntime.so) + target_include_directories(ortpersonalize PRIVATE ${CMAKE_SOURCE_DIR}/include/onnxruntime) find_library( # Sets the name of the path variable. log-lib # Specifies the name of the NDK library that # you want CMake to locate. log) target_link_libraries( # Specifies the target library. ortpersonalize # Links the target library to the log library # included in the NDK. ${log-lib} + onnxruntime)j. Build the application and wait for success to confirm that the app has included the ONNX Runtime headers and can link against the shared onnxruntime library successfully.
-
Packaging the Prebuilt Training Artifacts and Dataset
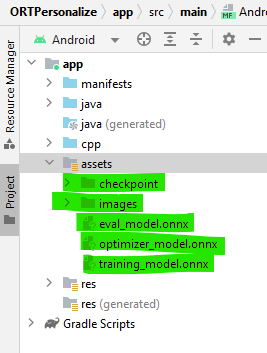
a. Create a new
assetsfolder inside theappfrom the left pane of the Android Studio project by right click app -> New -> Folder -> Assets Folder and place it under main.b. Copy the training artifacts generated in step 2 to this folder.
c. Now, head over to the
onnxruntime-training-examplesrepo and download the dataset (images.zip) to your machine and extract it. This dataset was modified from the orignalanimals-10dataset available on Kaggle created by Corrado Alessio.d. Copy the downloaded
imagesfolder toassets/imagesdirectory in Android Studio.The left pane of the project should look like this:
-
Interfacing with ONNX Runtime - C++ Code
a. We will implement the following four functions in C++ that will be called from the application:
createSession: Will be invoked on the application startup. It will create a newCheckpointStateandTrainingSessionobjects.releaseSession: Will be invoked when the application is about to close. This function will free up resources that were allocated at the start of the application.performTraining: Will be invoked when the user clicks theTrainbutton on the UI.performInference: Will be invoked when the user clicks theInferbutton on the UI.
b. Create Session
This function gets called when the application is launched. This will use the training artifacts assets to create the
C++CheckpointState and TrainingSession objects. These objects will be used for training the model on the device.The arguments to
createSessionare:checkpoint_path: Cached path to the checkpoint artifact.train_model_path: Cached path to the training model artifact.eval_model_path: Cached path to the eval model artifact.optimizer_model_path: Cached path to the optimizer model artifact.cache_dir_path: Path to the cache dir on the android device. The cache dir is used as a way to access the training artifacts from the C++ code.
The function returns a
longthat represents the pointer to thesession_cacheobject. Thislongcan be cast toSessionCachewhenever we need access to the training session.extern "C" JNIEXPORT jlong JNICALL Java_com_example_ortpersonalize_MainActivity_createSession( JNIEnv *env, jobject /* this */, jstring checkpoint_path, jstring train_model_path, jstring eval_model_path, jstring optimizer_model_path, jstring cache_dir_path) { std::unique_ptr<SessionCache> session_cache = std::make_unique<SessionCache>( utils::JString2String(env, checkpoint_path), utils::JString2String(env, train_model_path), utils::JString2String(env, eval_model_path), utils::JString2String(env, optimizer_model_path), utils::JString2String(env, cache_dir_path)); return reinterpret_cast<long>(session_cache.release()); }As can be seen from the function body above, this function creates a unique pointer to an object of the class
SessionCache. The definition ofSessionCacheis provided below.struct SessionCache { ArtifactPaths artifact_paths; Ort::Env ort_env; Ort::SessionOptions session_options; Ort::CheckpointState checkpoint_state; Ort::TrainingSession training_session; Ort::Session* inference_session; SessionCache(const std::string &checkpoint_path, const std::string &training_model_path, const std::string &eval_model_path, const std::string &optimizer_model_path, const std::string& cache_dir_path) : artifact_paths(checkpoint_path, training_model_path, eval_model_path, optimizer_model_path, cache_dir_path), ort_env(ORT_LOGGING_LEVEL_WARNING, "ort personalize"), session_options(), checkpoint_state(Ort::CheckpointState::LoadCheckpoint(artifact_paths.checkpoint_path.c_str())), training_session(session_options, checkpoint_state, artifact_paths.training_model_path.c_str(), artifact_paths.eval_model_path.c_str(), artifact_paths.optimizer_model_path.c_str()), inference_session(nullptr) {} };The definition of
ArtifactPathsis:struct ArtifactPaths { std::string checkpoint_path; std::string training_model_path; std::string eval_model_path; std::string optimizer_model_path; std::string cache_dir_path; std::string inference_model_path; ArtifactPaths(const std::string &checkpoint_path, const std::string &training_model_path, const std::string &eval_model_path, const std::string &optimizer_model_path, const std::string& cache_dir_path) : checkpoint_path(checkpoint_path), training_model_path(training_model_path), eval_model_path(eval_model_path), optimizer_model_path(optimizer_model_path), cache_dir_path(cache_dir_path), inference_model_path(cache_dir_path + "/inference.onnx") {} };c. Release Session
This function gets called when the application is about to shutdown. It releases the resources that were created when the application was launched, mainly the CheckpointState and the TrainingSession.
The arguments to
releaseSessionare:session:longrepresenting theSessionCacheobject.
extern "C" JNIEXPORT void JNICALL
Java_com_example_ortpersonalize_MainActivity_releaseSession(
      JNIEnv *env, jobject /* this */,
      jlong session) {
   auto *session_cache = reinterpret_cast<SessionCache *>(session);
   delete session_cache->inference_session;
   delete session_cache;
}
d. Perform Training
This function gets called for every batch that needs to be trained. The training loop is written on the application side in Kotlin, and within the training loop, the
performTrainingfunction gets invoked for every batch.The arguments to
performTrainingare:session:longrepresenting theSessionCacheobject.batch: Input images as a float array to be passed in for training.labels: Labels as an int array associated with the input images provided for training.batch_size: Number of images to process with eachTrainStep.channels: Number of channels in the image. For our example, this will always be invoked with the value3.frame_rows: Number of rows in the image. For our example, this will always be invoked with the value224.frame_cols: Number of columns in the image. For our example, this will always be invoked with the value224.
The function returns a
floatthat represents the training loss for this batch.extern "C" JNIEXPORT float JNICALL Java_com_example_ortpersonalize_MainActivity_performTraining( JNIEnv *env, jobject /* this */, jlong session, jfloatArray batch, jintArray labels, jint batch_size, jint channels, jint frame_rows, jint frame_cols) { auto* session_cache = reinterpret_cast<SessionCache *>(session); if (session_cache->inference_session) { // Invalidate the inference session since we will be updating the model parameters // in train_step. // The next call to inference session will need to recreate the inference session. delete session_cache->inference_session; session_cache->inference_session = nullptr; } // Update the model parameters using this batch of inputs. return training::train_step(session_cache, env->GetFloatArrayElements(batch, nullptr), env->GetIntArrayElements(labels, nullptr), batch_size, channels, frame_rows, frame_cols); }The above function leverages the
train_stepfunction. The definition of thetrain_stepfunction is as follows:namespace training { float train_step(SessionCache* session_cache, float *batches, int32_t *labels, int64_t batch_size, int64_t image_channels, int64_t image_rows, int64_t image_cols) { const std::vector<int64_t> input_shape({batch_size, image_channels, image_rows, image_cols}); const std::vector<int64_t> labels_shape({batch_size}); Ort::MemoryInfo memory_info = Ort::MemoryInfo::CreateCpu(OrtArenaAllocator, OrtMemTypeDefault); std::vector<Ort::Value> user_inputs; // {inputs, labels} // Inputs batched user_inputs.emplace_back(Ort::Value::CreateTensor(memory_info, batches, batch_size * image_channels * image_rows * image_cols * sizeof(float), input_shape.data(), input_shape.size(), ONNX_TENSOR_ELEMENT_DATA_TYPE_FLOAT)); // Labels batched user_inputs.emplace_back(Ort::Value::CreateTensor(memory_info, labels, batch_size * sizeof(int32_t), labels_shape.data(), labels_shape.size(), ONNX_TENSOR_ELEMENT_DATA_TYPE_INT32)); // Run the train step and execute the forward + loss + backward. float loss = *(session_cache->training_session.TrainStep(user_inputs).front().GetTensorMutableData<float>()); // Update the model parameters by taking a step in the direction of the gradients computed above. session_cache->training_session.OptimizerStep(); // Reset the gradients now that the parameters have been updated. // New set of gradients can then be computed for the next round of inputs. session_cache->training_session.LazyResetGrad(); return loss; } } // namespace traininge. Perform Inference
This function gets called when the user wants to perform inferencing.
The arguments to
performInferenceare:session:longrepresenting theSessionCacheobject.image_buffer: Input images as a float array to be passed in for training.batch_size: Number of images to process with each inference. For our example, this will always be invoked with the value1.image_channels: Number of channels in the image. For our example, this will always be invoked with the value3.image_rows: Number of rows in the image. For our example, this will always be invoked with the value224.image_cols: Number of columns in the image. For our example, this will always be invoked with the value224.classes: List of strings representing all the four custom classes.
The function returns a
stringthat represents one of the four custom classes provided. This is the prediction of the model.extern "C" JNIEXPORT jstring JNICALL Java_com_example_ortpersonalize_MainActivity_performInference( JNIEnv *env, jobject /* this */, jlong session, jfloatArray image_buffer, jint batch_size, jint image_channels, jint image_rows, jint image_cols, jobjectArray classes) { std::vector<std::string> classes_str; for (int i = 0; i < env->GetArrayLength(classes); ++i) { // Access the current string element jstring elem = static_cast<jstring>(env->GetObjectArrayElement(classes, i)); classes_str.push_back(utils::JString2String(env, elem)); } auto* session_cache = reinterpret_cast<SessionCache *>(session); if (!session_cache->inference_session) { // The inference session does not exist, so create a new one. session_cache->training_session.ExportModelForInferencing( session_cache->artifact_paths.inference_model_path.c_str(), {"output"}); session_cache->inference_session = std::make_unique<Ort::Session>( session_cache->ort_env, session_cache->artifact_paths.inference_model_path.c_str(), session_cache->session_options).release(); } auto prediction = inference::classify( session_cache, env->GetFloatArrayElements(image_buffer, nullptr), batch_size, image_channels, image_rows, image_cols, classes_str); return env->NewStringUTF(prediction.first.c_str()); }The above function calls
classify. The definition of classify is:namespace inference { std::pair<std::string, float> classify(SessionCache* session_cache, float *image_data, int64_t batch_size, int64_t image_channels, int64_t image_rows, int64_t image_cols, const std::vector<std::string>& classes) { std::vector<const char *> input_names = {"input"}; size_t input_count = 1; std::vector<const char *> output_names = {"output"}; size_t output_count = 1; std::vector<int64_t> input_shape({batch_size, image_channels, image_rows, image_cols}); Ort::MemoryInfo memory_info = Ort::MemoryInfo::CreateCpu(OrtArenaAllocator, OrtMemTypeDefault); std::vector<Ort::Value> input_values; // {input images} input_values.emplace_back(Ort::Value::CreateTensor(memory_info, image_data, batch_size * image_channels * image_rows * image_cols * sizeof(float), input_shape.data(), input_shape.size(), ONNX_TENSOR_ELEMENT_DATA_TYPE_FLOAT)); std::vector<Ort::Value> output_values; output_values.emplace_back(nullptr); // get the logits session_cache->inference_session->Run(Ort::RunOptions(), input_names.data(), input_values.data(), input_count, output_names.data(), output_values.data(), output_count); float *output = output_values.front().GetTensorMutableData<float>(); // run softmax and get the probabilities of each class std::vector<float> probabilities = Softmax(output, classes.size()); size_t best_index = std::distance(probabilities.begin(), std::max_element(probabilities.begin(), probabilities.end())); return {classes[best_index], probabilities[best_index]}; } } // namespace inferenceThe classify function invokes another function called
Softmax. The definition ofSoftmaxis:std::vector<float> Softmax(float *logits, size_t num_logits) { std::vector<float> probabilities(num_logits, 0); float sum = 0; for (size_t i = 0; i < num_logits; ++i) { probabilities[i] = exp(logits[i]); sum += probabilities[i]; } if (sum != 0.0f) { for (size_t i = 0; i < num_logits; ++i) { probabilities[i] /= sum; } } return probabilities; } -
a. The
MobileNetV2model expects that the input image provided be- of size
3 x 224 x 224. - a normalized image with the mean
(0.485, 0.456, 0.406)subtracted and divided by the standard deviation(0.229, 0.224, 0.225)
This preprocessing is done in Java/Kotlin using the android provided libraries.
Let’s create a new file called
ImageProcessingUtil.ktunder theapp/src/main/java/com/example/ortpersonalizedirectory. We will add the utility methods for cropping and resizing, and normalizing the images in this file.b. Cropping and resizing the image.
fun processBitmap(bitmap: Bitmap) : Bitmap {
   // This function processes the given bitmap by
   //   - cropping along the longer dimension to get a square bitmap
   //     If the width is larger than the height
   //     ___+_________________+___
   //     |  +                 +  |
   //     |  +                 +  |
   //     |  +        +        +  |
   //     |  +                 +  |
   //     |__+_________________+__|
   //     <-------- width -------->
   //        <----- height ---->
   //     <-->      cropped    <-->
   //
   //     If the height is larger than the width
   //     _________________________   ʌ            ʌ
   //     |                       |   |         cropped
   //     |+++++++++++++++++++++++|   |      ʌ     v
   //     |                       |   |      |
   //     |                       |   |      |
   //     |           +           | height width
   //     |                       |   |      |
   //     |                       |   |      |
   //     |+++++++++++++++++++++++|   |      v     ʌ
   //     |                       |   |         cropped
   //     |_______________________|   v            v
   //
   //
   //
   //   - resizing the cropped square image to be of size (3 x 224 x 224) as needed by the
   //     mobilenetv2 model.
   lateinit var bitmapCropped: Bitmap
   if (bitmap.getWidth() >= bitmap.getHeight()) {
      // Since height is smaller than the width, we crop a square whose length is the height
      // So cropping happens along the width dimesion
      val width: Int = bitmap.getHeight()
      val height: Int = bitmap.getHeight()

      // left side of the cropped image must begin at (bitmap.getWidth() / 2 - bitmap.getHeight() / 2)
      // so that the cropped width contains equal portion of the width on either side of center
      // top side of the cropped image must begin at 0 since we are not cropping along the height
      // dimension
      val x: Int = bitmap.getWidth() / 2 - bitmap.getHeight() / 2
      val y: Int = 0
      bitmapCropped = Bitmap.createBitmap(bitmap, x, y, width, height)
   } else {
      // Since width is smaller than the height, we crop a square whose length is the width
      // So cropping happens along the height dimesion
      val width: Int = bitmap.getWidth()
      val height: Int = bitmap.getWidth()

      // left side of the cropped image must begin at 0 since we are not cropping along the width
      // dimension
      // top side of the cropped image must begin at (bitmap.getHeight() / 2 - bitmap.getWidth() / 2)
      // so that the cropped height contains equal portion of the height on either side of center
      val x: Int = 0
      val y: Int = bitmap.getHeight() / 2 - bitmap.getWidth() / 2
      bitmapCropped = Bitmap.createBitmap(bitmap, x, y, width, height)
   }

   // Resize the image to be channels x width x height as needed by the mobilenetv2 model
   val width: Int = 224
   val height: Int = 224
   val bitmapResized: Bitmap = Bitmap.createScaledBitmap(bitmapCropped, width, height, false)

   return bitmapResized
}
c. Normalizing the image.
fun processImage(bitmap: Bitmap, buffer: FloatBuffer, offset: Int) {
   // This function iterates over the image and performs the following
   // on the image pixels
   //   - normalizes the pixel values to be between 0 and 1
   //   - substracts the mean (0.485, 0.456, 0.406) (derived from the mobilenetv2 model configuration)
   //     from the pixel values
   //   - divides by pixel values by the standard deviation (0.229, 0.224, 0.225) (derived from the
   //     mobilenetv2 model configuration)
   // Values are written to the given buffer starting at the provided offset.
   // Values are written as follows
   // |____|____________________|__________________| <--- buffer
   //      ʌ                                         <--- offset
   //                           ʌ                    <--- offset + width * height * channels
   // |____|rrrrrr|_____________|__________________| <--- red channel read in column major order
   // |____|______|gggggg|______|__________________| <--- green channel read in column major order
   // |____|______|______|bbbbbb|__________________| <--- blue channel read in column major order

   val width: Int = bitmap.getWidth()
   val height: Int = bitmap.getHeight()
   val stride: Int = width * height

   for (x in 0 until width) {
      for (y in 0 until height) {
            val color: Int = bitmap.getPixel(y, x)
            val index = offset + (x * height + y)

            // Subtract the mean and divide by the standard deviation
            // Values for mean and standard deviation used for
            // the movilenetv2 model.
            buffer.put(index + stride * 0, ((Color.red(color).toFloat() / 255f) - 0.485f) / 0.229f)
            buffer.put(index + stride * 1, ((Color.green(color).toFloat() / 255f) - 0.456f) / 0.224f)
            buffer.put(index + stride * 2, ((Color.blue(color).toFloat() / 255f) - 0.406f) / 0.225f)
      }
   }
}
d. Getting a Bitmap from a Uri
fun bitmapFromUri(uri: Uri, contentResolver: ContentResolver): Bitmap { // This function reads the image file at the given uri and decodes it to a bitmap val source: ImageDecoder.Source = ImageDecoder.createSource(contentResolver, uri) return ImageDecoder.decodeBitmap(source).copy(Bitmap.Config.ARGB_8888, true) } - of size
-
a. For this tutorial, we will be using the following user interface elements:
- Train and Infer buttons
- Class buttons
- Status message text
- Image display
- Progress dialogue
b. This tutorial does not intend to show how the graphical user interface is created. For this reason, we will simply re-use the files available on GitHub.
c. Copy all the string definitions from
strings.xmltostrings.xmllocal to your Android Studio.d. Copy the contents from
activity_main.xmltoactivity_main.xmllocal to your Android Studio.e. Create a new file under the
layoutfolder calleddialog.xml. Copy the contents fromdialog.xmlto the newly createddialog.xmllocal to your Android Studio.f. The remainder of the changes in this section need to be made in the MainActivity.kt file.
g. Launching the application
When the application launches, the
onCreatefunction gets invoked. This function is responsible for setting up the session cache and the user interface handlers.Please refer to the
onCreatefunction in theMainActivity.ktfile for the code.h. Custom class button handlers - We would like to use the class buttons for users to select their custom images for training. We need to add the listeners for these buttons to do this. These listeners will do exactly that.
Please refer to these button handlers in
MainActivity.kt:- onClassAClickedListener
- onClassBClickedListener
- onClassXClickedListener
- onClassYClickedListener
i. Personalize the custom class labels
By default, the custom class labels are
[A, B, X, Y]. But, let’s allow users to rename these labels for clarity. This is achieved by long click listeners namely (defined inMainActivity.kt):- onClassALongClickedListener
- onClassBLongClickedListener
- onClassXLongClickedListener
- onClassYLongClickedListener
j. Toggling the custom classes.
When the custom class toggle is turned off, the prepackaged animals dataset is run. And when it is turned on, the user is expected to bring their own dataset for training. To handle this transition, the
onCustomClassSettingChangedListenerswitch handler is implemented inMainActivity.kt.k. Training handler
When each class has at least 1 image, the
Trainbutton can be enabled. When theTrainbutton is clicked, training kicks in for the selected images. The training handler is responsible for:- collecting the training images into one container.
- shuffling the order of the images.
- cropping and resizing the images.
- normalizing the images.
- batching the images.
- executing the training loop (invoking the C++
performTrainingfunction in a loop).
The
onTrainButtonClickedListenerfunction defined inMainActivity.ktdoes the above.l. Inference handler
Once training is complete, the user can click the
Inferbutton to infer any image. The inference handler is responsible for- collecting the inference image.
- cropping and resizing the image.
- normalizing the image.
- invoking the C++
performInferencefunction. - Reporting the inferred output to the user interface.
This is achieved by the
onInferenceButtonClickedListenerfunction inMainActivity.kt.m. Handler for all the activities mentioned above
Once the image(s) have been selected for inference or for the custom classes, they need to be processed. The
onActivityResultfunction defined inMainActivity.ktdoes that.n. One last thing. Add the following in the
AndroidManifest.xmlfile to use the camera:<uses-permission android:name="android.permission.CAMERA" /> <uses-feature android:name="android.hardware.camera" />
Training Phase - Running the application on a device
-
Running the application on a device
a. Let’s connect our Android device to the machine and run the application on the device.
b. Launching the application on the device should look like this:
-
Training with a pre-loaded dataset - Animals
a. Let’s get started with training using the pre-loaded animals device by launching the application on the device.
b. Toggle the
Custom classesswitch at the bottom.c. The class labels will change to
Dog,Cat,ElephantandCow.d. Run
Trainingand wait for the progress dialog to disappear (upon training completion).e. Use any animal image from your library for inferencing now.
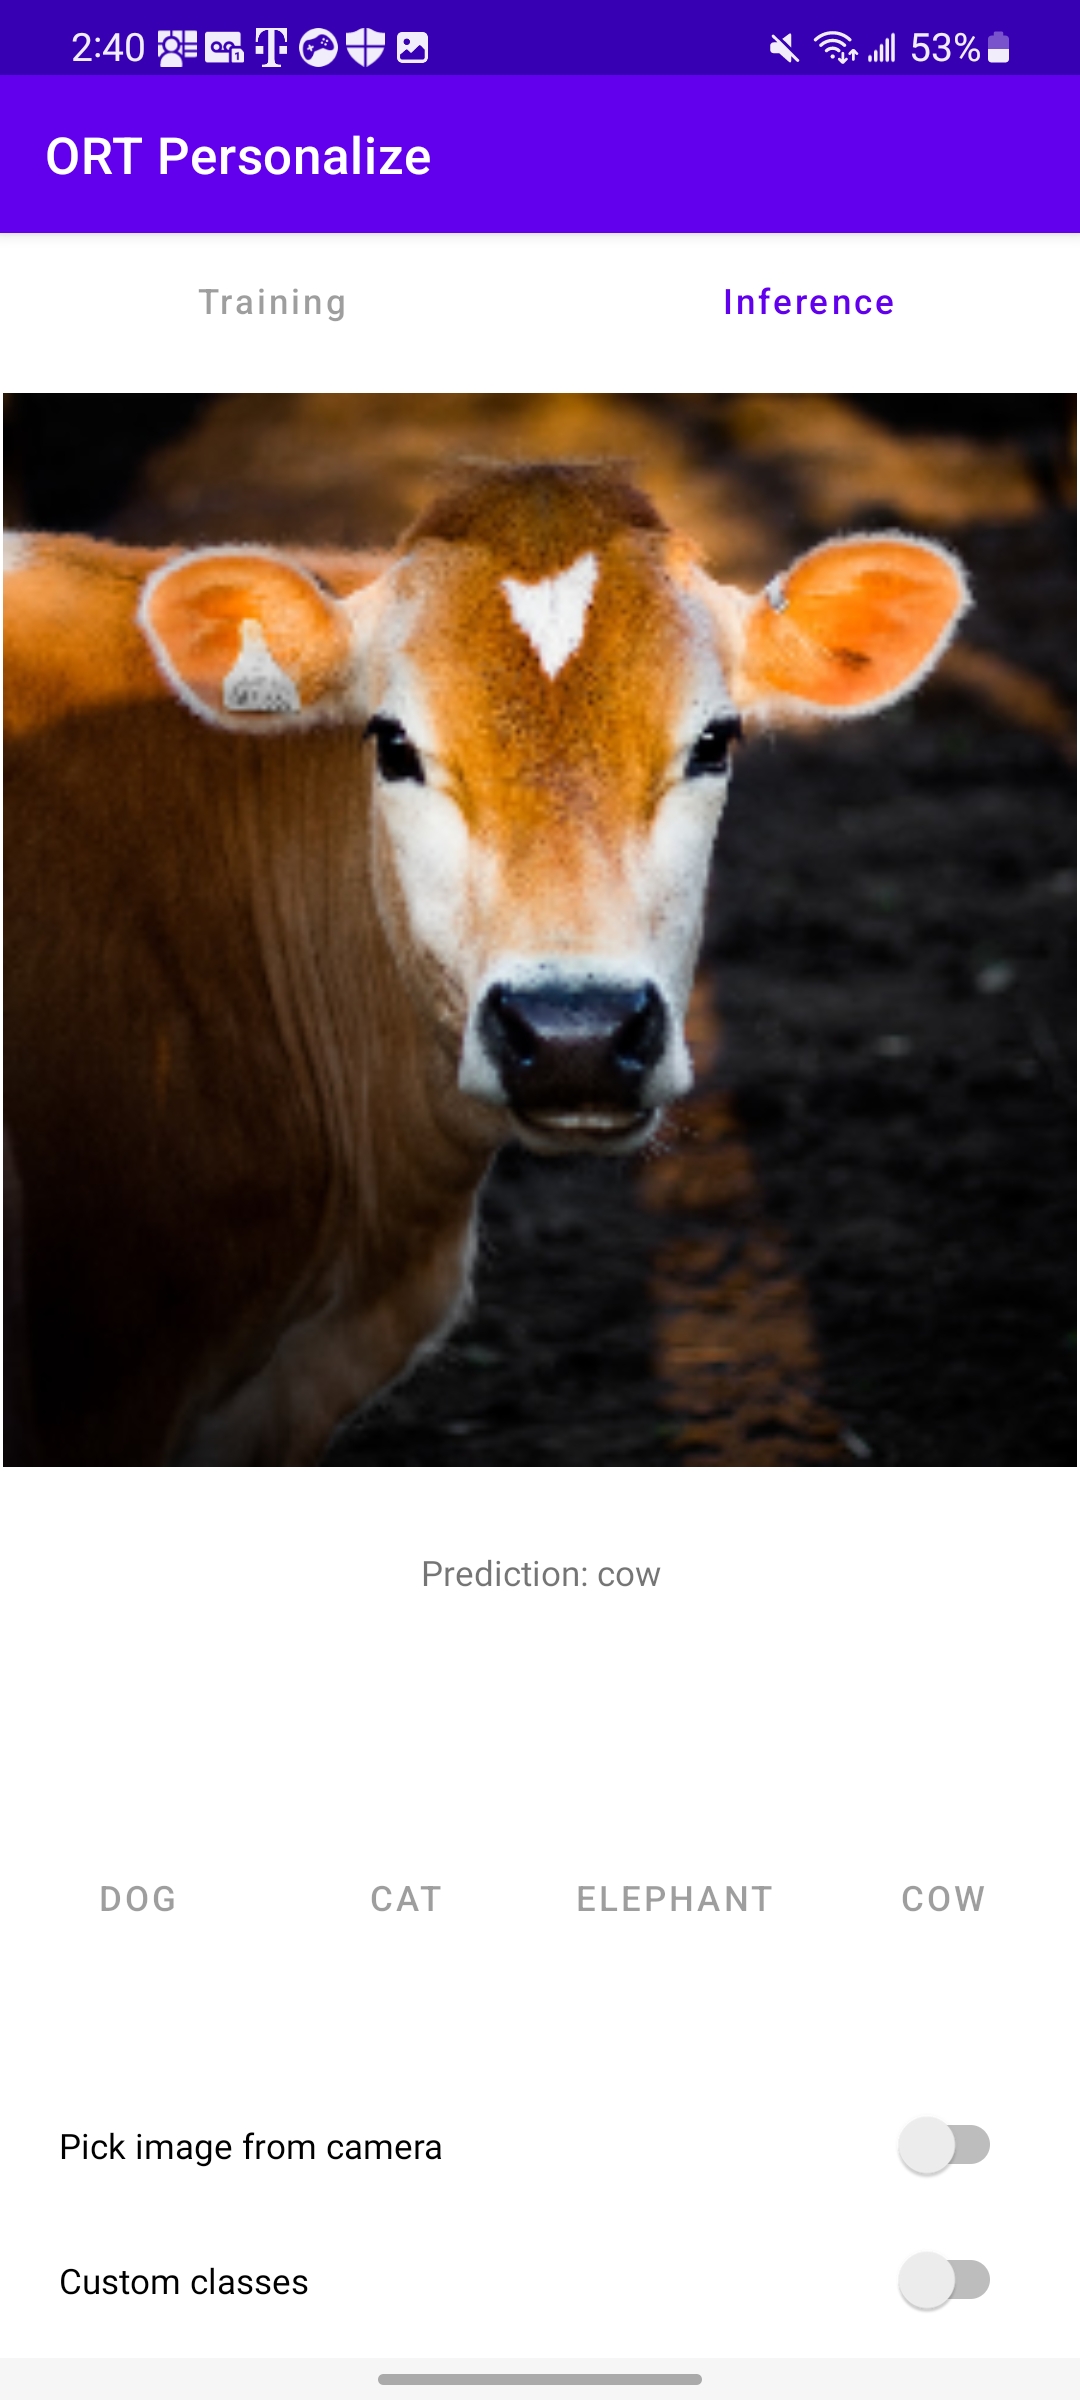
As can be seen from the image above, the model correctly predicted
Cow. -
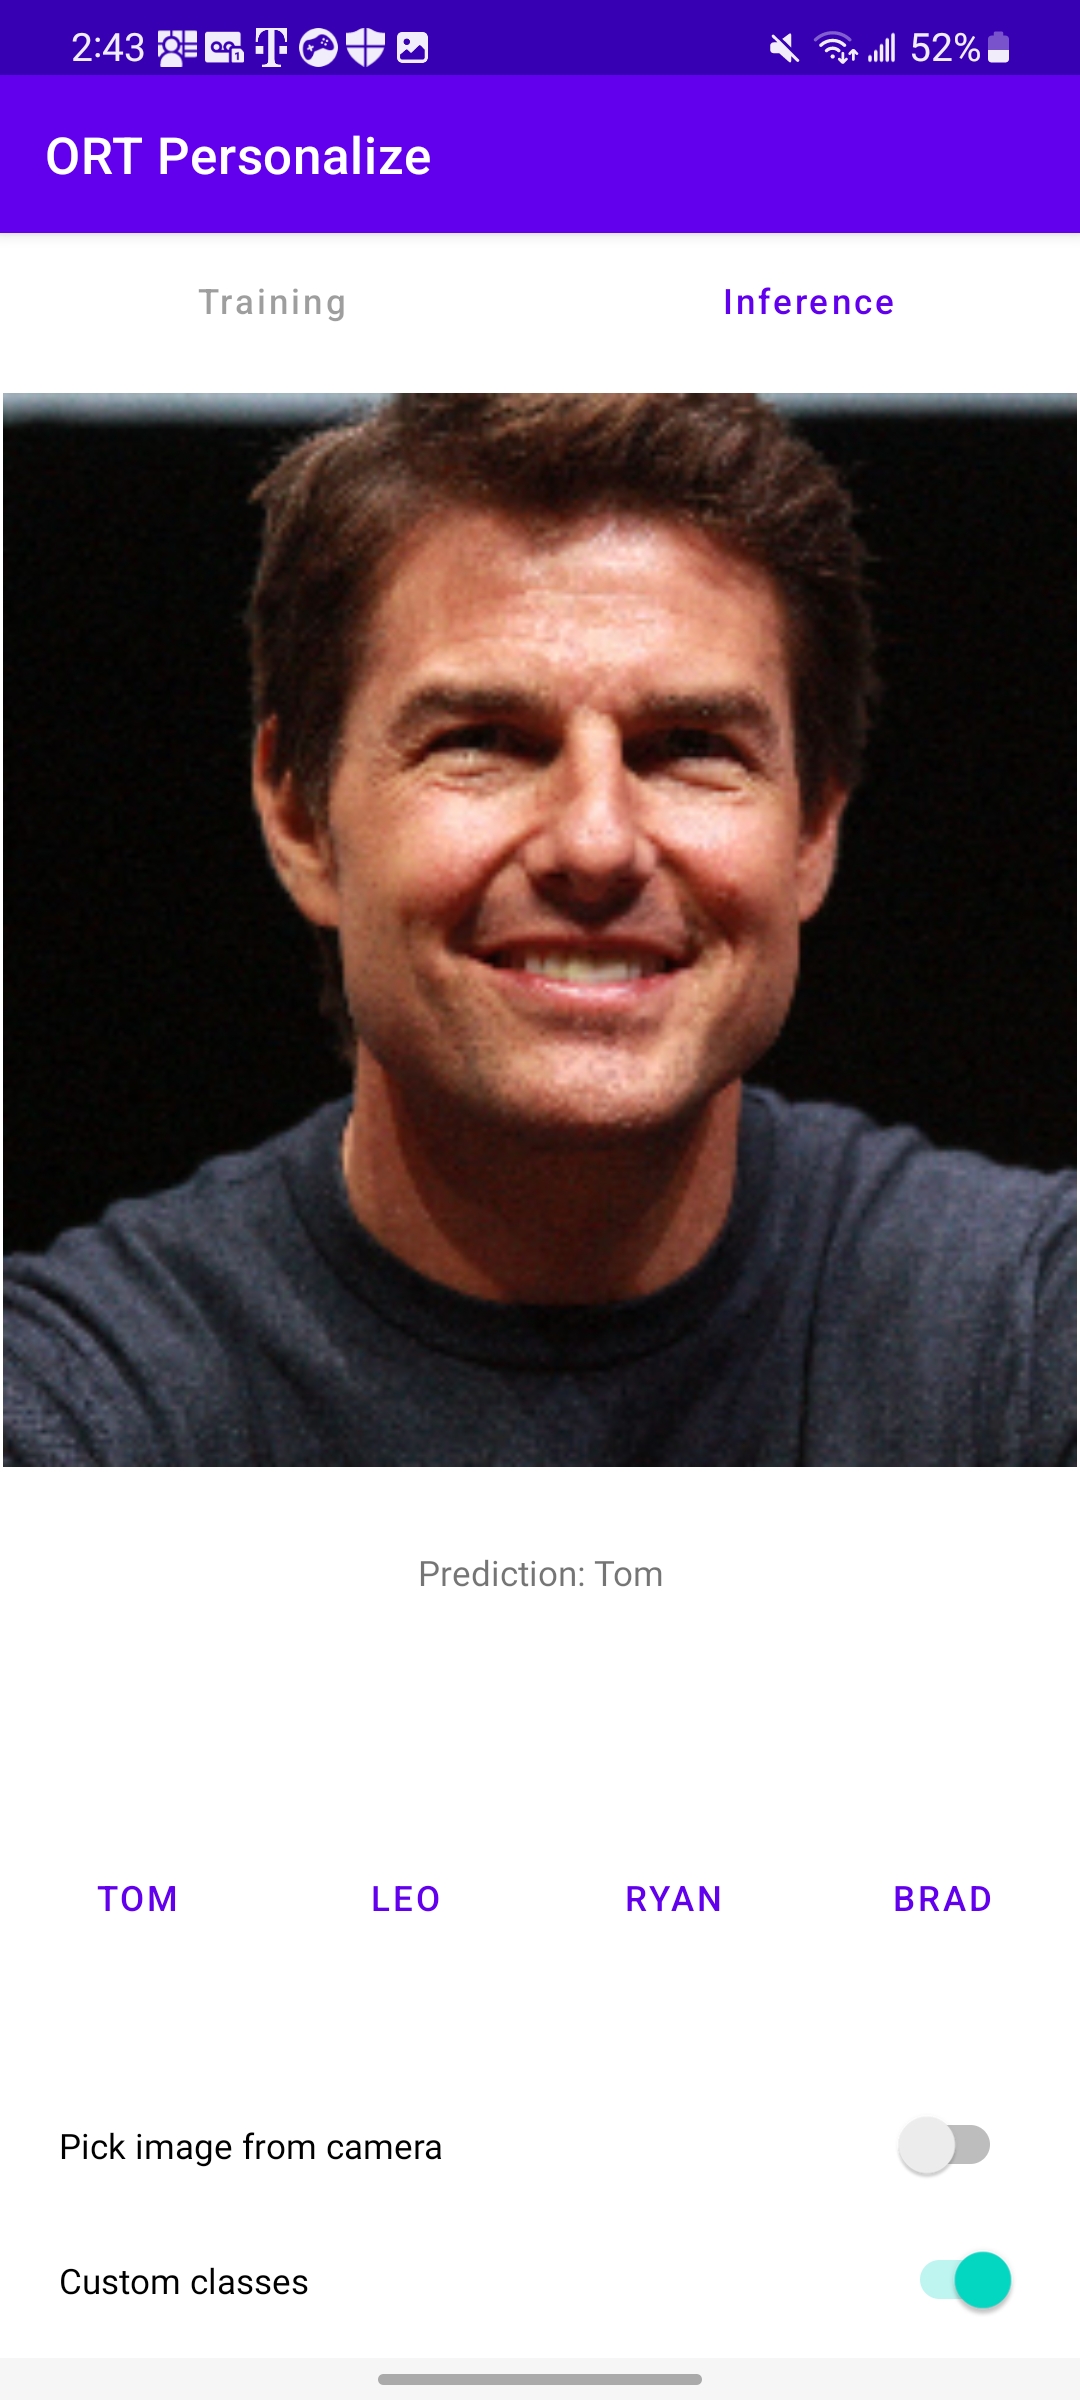
Training with a custom dataset - Celebrities
a. Download images of Tom Cruise, Leonardo DiCaprio, Ryan Reynolds and Brad Pitt from the web.
b. Make sure you launch a fresh session of the app by closing the app and relaunching it.
c. After the application launches, rename the four classes to
Tom,Leo,Ryan,Bradrespectively using the long click.d. Click on the button for each class and select images associated with that celebrity. We can use around 10~15 images per category.
e. Hit the
Trainbutton and let the application learn from the data provided.f. Once the training is complete, we can hit the
Inferbutton and provide an image that the application has not seen yet.g. That’s it!. Hopefully the application classified the image correctly.
Conclusion
Congratulations! You have successfully built an Android application that learns to classify images using ONNX Runtime on the device. The application is also made available on GitHub at onnxruntime-training-examples.