Write a mobile object detection iOS application
Learn how to build an iOS object detection app with ONNX Runtime. This application continuously detect the objects in the frames seen by your iOS device’s back camera and display:
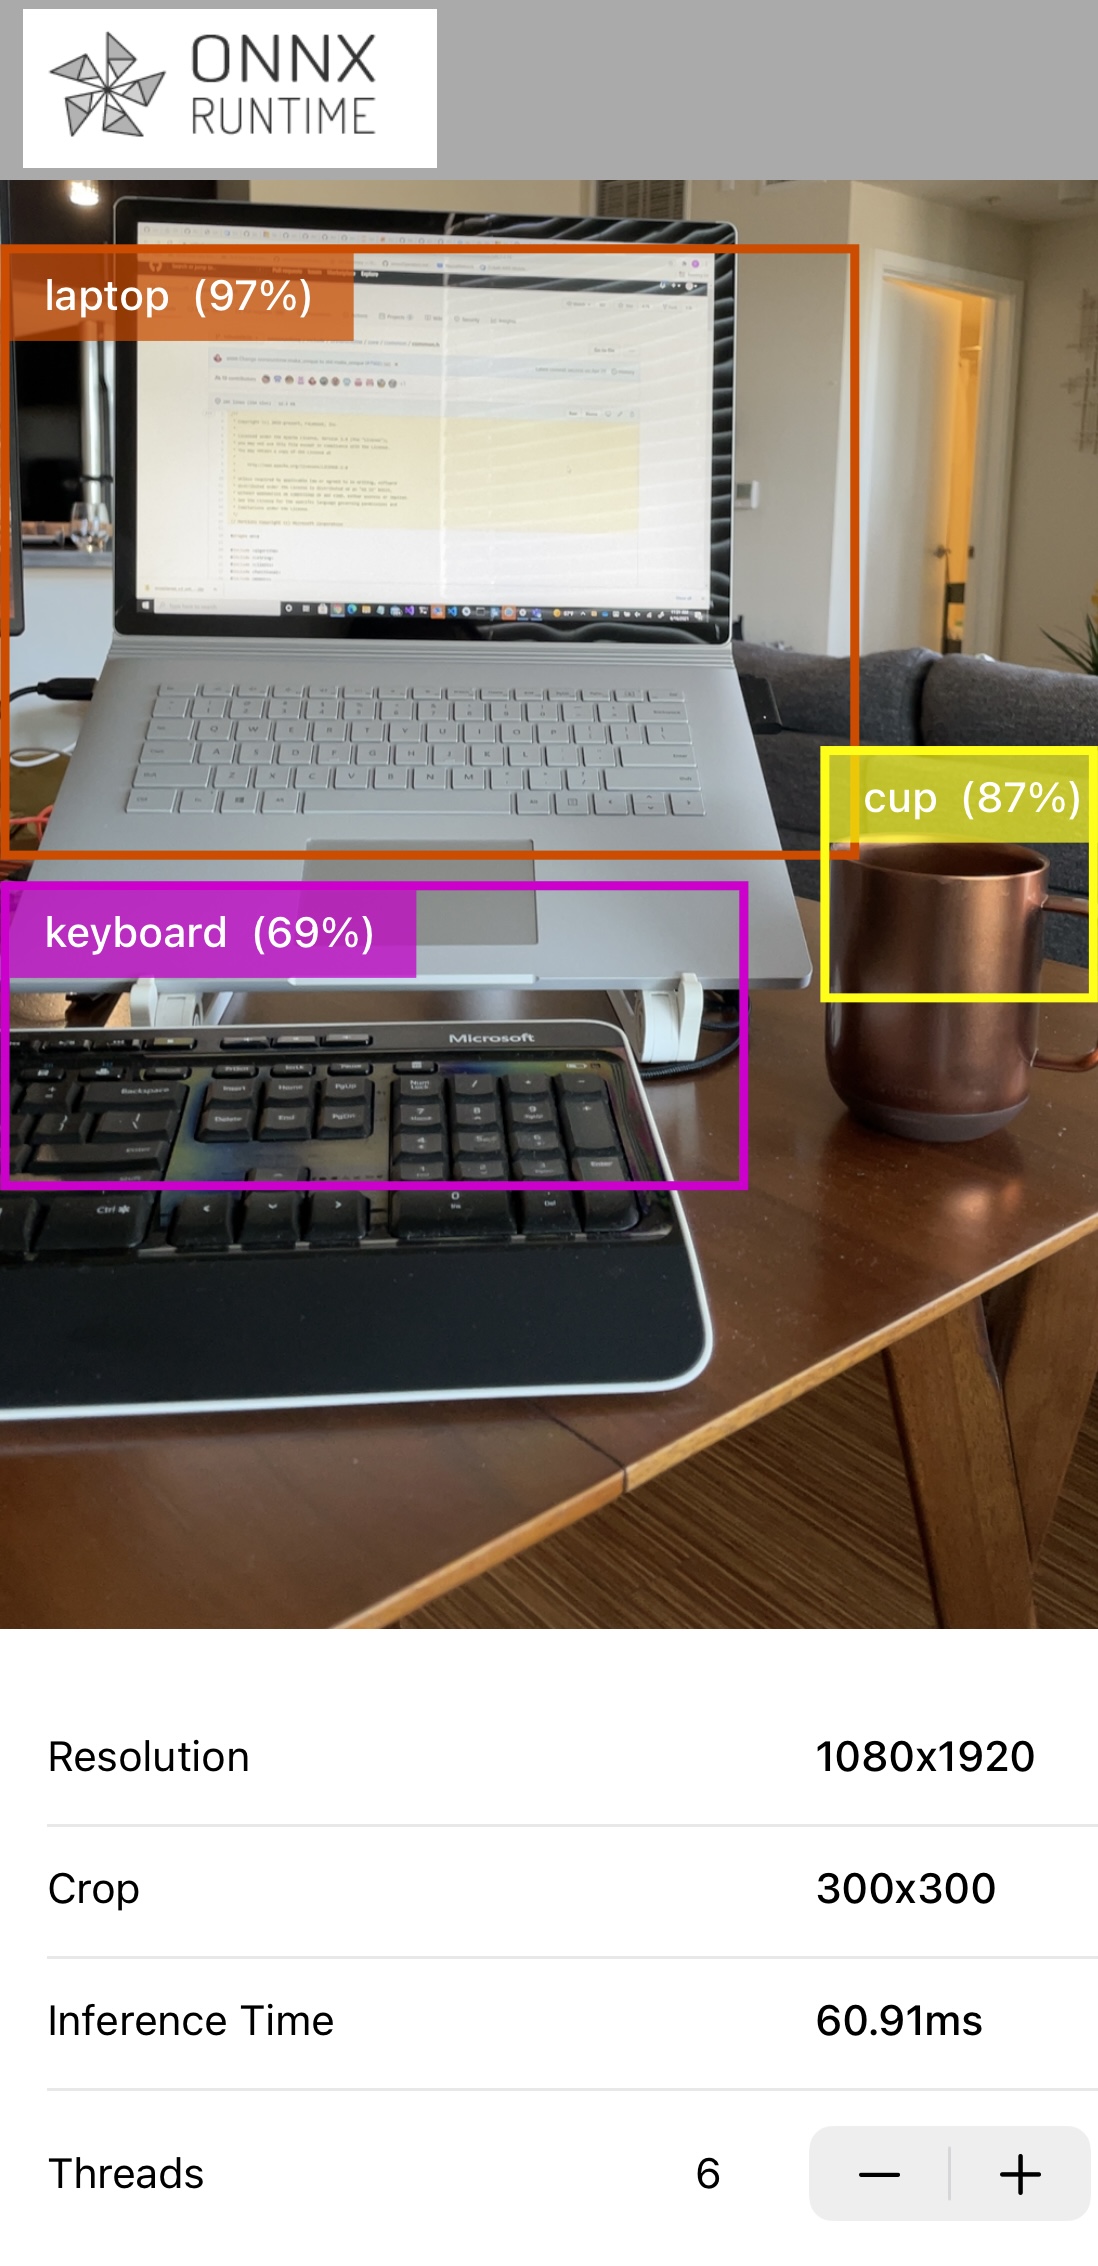
- the class (type) of objects detected
- the bounding box of the detected objects
- the inference confidence
The application uses the pre-trained quantized MobileNet SSD V1 model.
This example is heavily based on Google Tensorflow lite - Object Detection Examples
Here’s an example screenshot of the app:
Contents
Pre-requisites
- Xcode 12.5 and above (preferably latest version)
- A valid Apple Developer ID
- A real iOS device with a camera (preferably iphone 12/iphone 12 pro)
- Xcode command line tools
xcode-select --install - Clone the onnxruntime-inference-examples source code repo
Prepare the model for mobile deployment
-
Create a separate Python environment so that this app’s dependencies are separate from other python projects
conda create -n ios-app Python=3.8 conda activate ios-app -
Install Python dependencies
cd <onnxruntime-inference-example-root>/mobile/examples/object_detection/ios/ORTObjectDetection
pip install -r ./prepare_model.requirements.txt
The requirements file contains the onnxruntime, tf2onnx and tensorflow python packages required for model conversion in the next step.
-
Download the model and convert it into ORT format
./prepare_model.shThe script:
- downloads the original tflite model along with the model metadata
labelmap.txt - converts it to ONNX format
- further converts it to ORT format, which can be executed by the ONNX Mobile Runtime
The script outputs a
ModelsAndDatadirectory, which contains the ORT format model,ssd_mobilenet_v1.all.ortand the model label data file,labelmap.txt.Conversion of this model is a two part process. The original model is in tflite format. This is firstly converted to ONNX format using the tf2onnx converter.
The model is then converted into ORT format using the onnx to ort converter.
As well as generating the model in ORT format, the conversion script also outputs an operator config file
- downloads the original tflite model along with the model metadata
Create iOS application
-
Install CocoaPods
sudo gem install cocoapods -
Install dependencies and generate workspace file
cd <onnxruntime-inference-example-root>/mobile/examples/object_detection/ios/
pod install
The
Podfilecontains theonnxruntime-objcdependency, which is the pod containing the Objective C API.At the end of this step, you should see a file called
ORTObjectDetection.xcworkspacein themobile/examples/object_detection/iosdirectory.This tutorial uses one of the pre-built packages for ONNX Runtime mobile. You can also build your own custom runtime if the demands of your target environment require it. To include the custom ONNX Runtime build in your iOS app, see Custom iOS package
-
Build the project
Open
<onnxruntime-inference-example-root>/mobile/examples/object_detection/ios/ORTObjectDetection.xcworkspacein Xcode.Select your
Development Teamin theSigning & Capabilitiesworkspace settings.Click on
Product->Build for Runningto compile the application. -
Run the application
Connect your iOS device and run the app. You’ll have to grant permissions for the app to use the device’s camera.
You should see an app with the ONNX Runtime logo on your device. Running the app opens your camera and performs object detection. «Insert screenshot»
Related information
-
This app uses ONNX Runtime Objective-C API for performing object detection functionality.
It is written entirely in Swift and uses a bridgingheader file for the framework to be used in a Swift app.
-
The original TensorFlow tutorial and model are here
-
For more information on converting tflite models to ONNX Converting TFlite models to ONNX